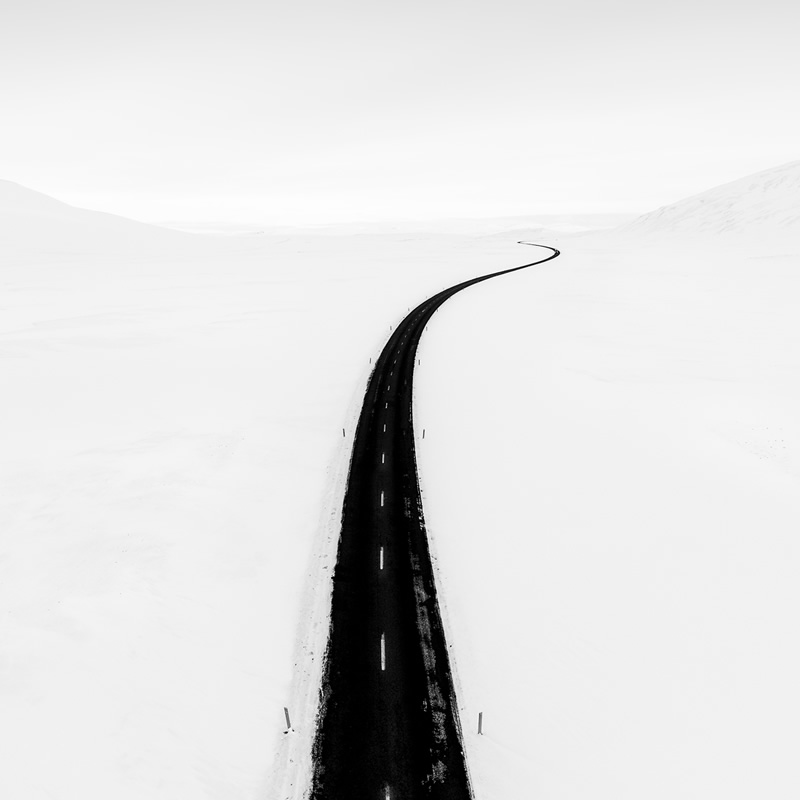
The sky can be an amazing subject for photography. Photographing the sky at sunrise and sunset is a great way of capturing the amazing colors. Photographing sunrise and sunset gives your photos an entirely different feel. It's also a great idea, to take photos during golden hour.
YouCam Perfect
YouCam Perfect is an essential app for anyone who has ever taken photos and needed to edit them. The extensive collection of photo editing tools combined with hyper-realistic effects are designed to create incredible visual effects. You can modify your photos using the app, including adding frames, stickers and animations to your photos. The app's sky replacement tool allows you to replace the sky in photos.
YouCam Perfect features a powerful and real-time beautification function that lets you add or remove beauty effects from your photos. The app features an intuitive interface, advanced augmented reality technology and artificial intelligence to give images a unique look. Beauty Circle is a fashion social networking that lets users share and search for the latest fashion trends.

BeFunky
BeFunky has a Replace Color tool that allows you to change the color sky in a photo. You have two options when using the Replace Color tool. The Target Color is the color you want to change and the Source Color is the original image. The Source Color is your original image's color. The Target Color is the one you want to change. By choosing the latter, you will be able to replace the overexposed sky in your picture with the desired color.
BeFunky is a free picture editing app that allows you to change the color of any picture. You can also remove backgrounds from portraits. It offers a variety of vector graphics and stock pictures to choose from. It is easy to use in your web browser. There is also a mobile version. It is completely free to download, has many photo editing options, and offers a great user interface.
BeFunky's Replace Color tool
BeFunky's Replace Color Tool allows you to change your sky photo's color. There are two options available: Target Color and Source Color. Select the Source Color first and then choose the color that you want to replace. You can also change the color of the sky by adjusting the Tolerance slider.
Replace Color tool allows you to replace the color of any area of the picture with another one. It can be used to match any colour palette and create completely new pictures. You can also use the Replace Color tool to create unlimited wardrobes. You can modify the colors and patterns for clothes. It produces realistic results.
YouCam Perfect's Change Background tool
YouCam Perfect's change background tool is great for changing the sky photo you have been using. This app has 30 sky replacement options. It makes it super easy to change the sky on your photos. You can easily change the color of your sky with just a few clicks. To make your sky even more perfect, you can zoom in and adjust sliders.
There are fun animations that can be used to enhance your photos. You can make your photos more vibrant or summery by adding sparkles to them. The app even allows you to export your new animation as a GIF, video, or perfect shape for Instagram. Upgrade to the premium version to get unlimited editing on two photos per day.
FAQ
Where to Buy Cameras?
There are many places online that you can purchase cameras. B&H Photo Video is a well-respected retailer. They have knowledgeable staff that can help answer any questions you may have.
B&H also ships quickly and securely, making it easy to get your order delivered to your door.
Check out this video to learn more about purchasing cameras.
What is the rule of thirds in photography?
The rule of Thirds allows you to create unique compositions with minimal camera settings. It divides your photo into nine equal parts horizontally as well vertically. This divides your image into three areas that you would like to see your subject. These are the top third (the upper left corner), middle third (center), and bottom third (lower right). You can use these areas as guides for positioning your subject within your frame.
The rule to thirds allows you to avoid placing important elements too closely together or too far apart. You might not have enough space between them for a strong visual impact if you put them close together. You might find that they lose focus if you place them too close together.
Which Lenses Do I Need?
Beginners often ask, "What lens should I purchase?" There are many options. It can be difficult to make a decision.
You don't have to buy a brand new lens each time you purchase a new camera. You can simply add lenses later.
For starters, here are three types of lenses you might want to consider.
-
Wide Angle Lens (14mm-24mm): These lenses have a wide view angle that will allow you to capture more of your subject. You can zoom in and not lose image quality.
-
Standard/Normal Zoom Lens (28mm-70mm): These lenses let you change the focal length while still maintaining excellent image quality.
-
Telephoto Zoom Lens (70mm to 200mm): These lenses make it easy to capture distant subjects. These lenses allow you to focus on your subject, even though they may appear small in the frame.
These lenses can be combined in a variety of ways to create new effects. Combining lenses can create different effects. For example, a normal lens could be used to capture small details while a telephoto lens is used to capture faraway objects.
Is digital photography hard?
Digital photography is not as simple as it seems. You will need to spend time learning how to use these tools correctly. It is important to be familiar with the settings that are best for each type of shot. Learning by doing is the best way to learn. Practice makes perfect.
How can my phone improve my photo skills?
You don't need expensive equipment to take great photos! Amazing images are possible with just a smartphone.
It is easy to learn how to use its various features and some basic techniques.
There are many apps to help you edit and share your photos on both Android and iOS.
Here are five tips for taking better pictures.
-
Set Up Your Camera App. Your device should already have your camera app installed. If your camera app isn't installed on your device, download it from Google Play.
-
Use effects and filters. Filters and effects allow you to change the appearance of your photo without having to touch your image.
-
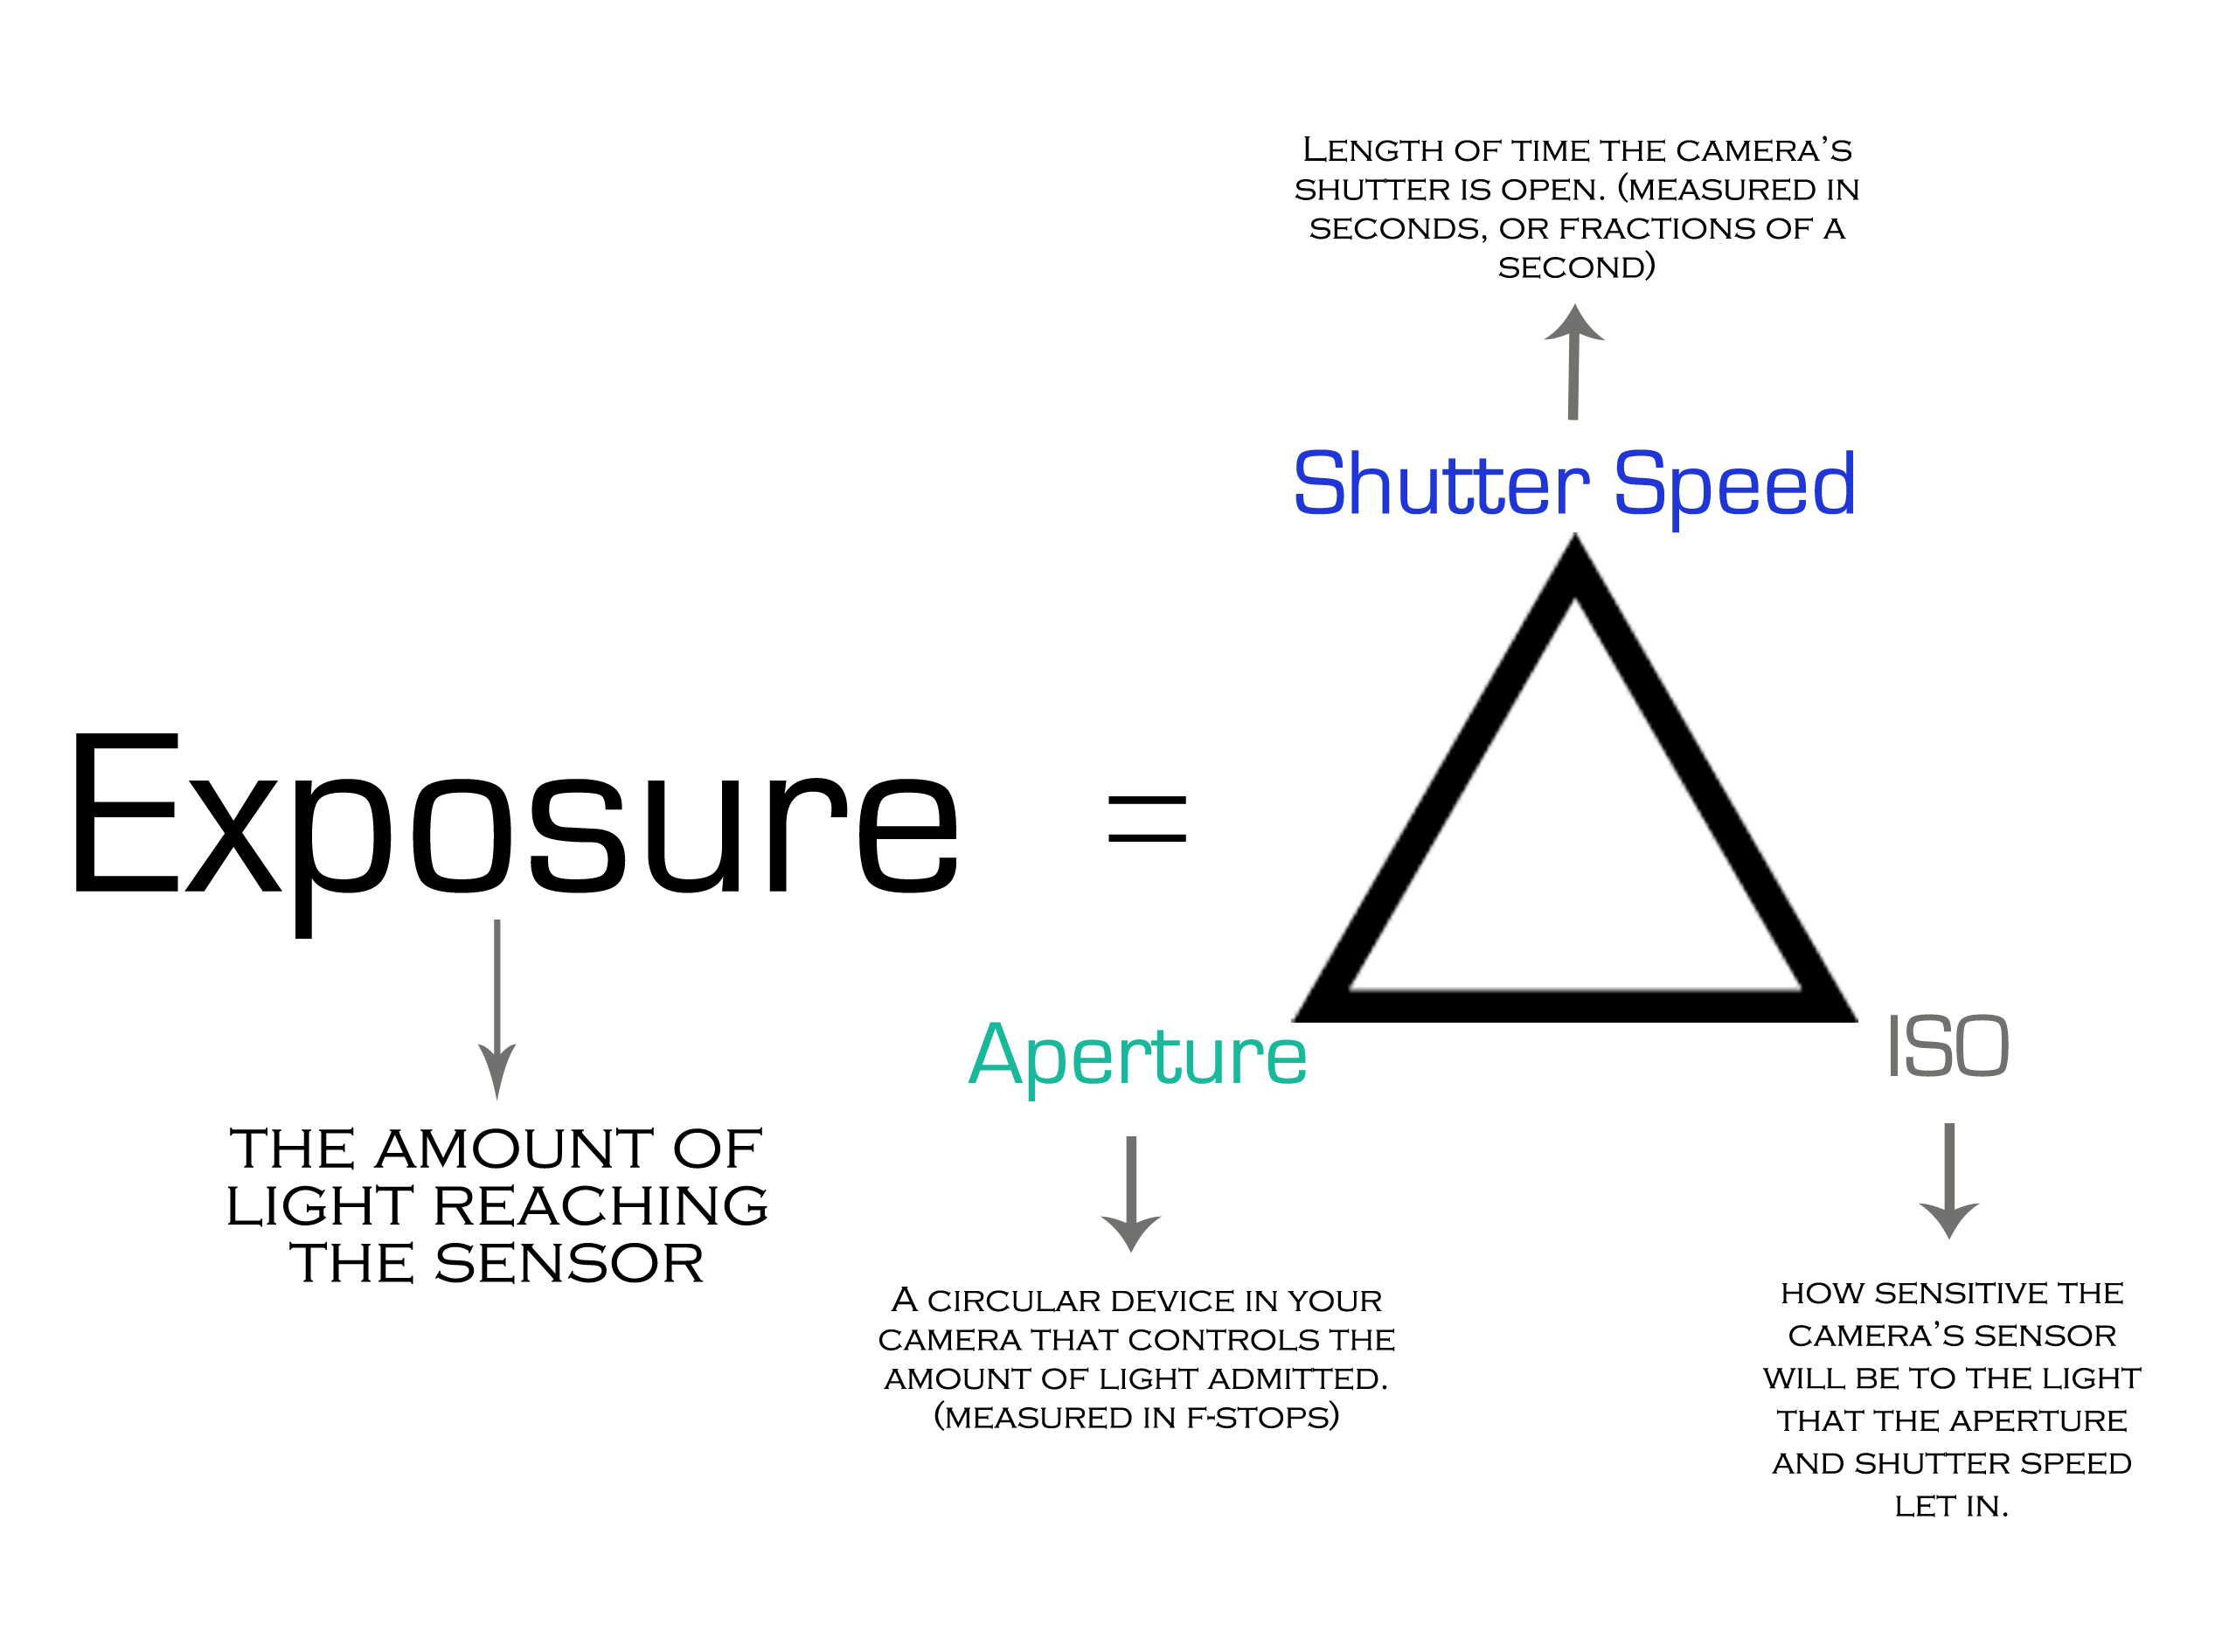
Adjust the Exposure. Adjusting the exposure can help you control the brightness in your picture.
-
Take the right lighting. Photographing in bright lighting makes it easier for you to see details within your subject. You can capture highlights and shadows in low-light conditions.
-
Take Pictures Of People. It is a great way to share your love with others by taking pictures of them.
Check out this article to learn how to take better pictures with your smartphone: 5 Tips To Improve Photography Skills
How can I learn how to photograph on my own.
There are many ways you can learn to take great pictures. You have the option to buy a book and attend classes, join an on-line community, or watch YouTube tutorials. You can't go wrong with doing it yourself if you are serious about mastering the art of photographing. You have full control over the final product. And as long as you keep learning, you'll always improve.
One of the best aspects about digital photography is that it doesn't require any expensive equipment. All you need to get started is an internet-connected computer and a digital camera. All the rest is up to your imagination.
Here are some ways to get started.
-
Familiarize yourself with the manual settings for your camera.
-
Learn the basics of how to use these controls.
-
Make sure to take lots of pictures.
-
Modify them.
-
Share them.
-
Keep practicing.
-
Experiment.
-
Consider different angles and perspectives.
-
Use light sources creatively.
-
Practice makes perfect.
-
Do not be afraid to fail.
-
Be patient.
-
Have fun
Statistics
- Get 40% off Adobe Creative Cloud(opens in new tab) (creativebloq.com)
- That's the easiest way to get blurry photos 100% of the time. (photographylife.com)
- While I cannot prove that all of those spots were not sensor dust, the photo was taken during a heavy snowstorm…so I guess that 99.8% of the spots are snowflakes. (bhphotovideo.com)
- In this case, 100% of readers who voted found the article helpful, earning it our reader-approved status. (wikihow.com)
External Links
How To
How to Take Portrait Photos
Portraits are important because they show who you are. They also tell your story. It's possible to have a favourite picture of yourself, but you are now looking for something different. It is easy to forget the joy of taking photos. These are some tips that will help you get started.
-
Make sure that you have enough light. The best time to photograph portraits is in the morning and late afternoon. Flashes should not be used in direct sunlight. This will wash out any details. It is best to avoid shooting at midday. Too many shadows will result.
-
Use a tripod. The camera will not move if it is held still. This means that you will miss the opportunity to freeze motion. If you plan to use flash, make sure that your shot is set up without one. After that, turn off the flash again and start over.
-
Close-ups are best. Closeups allow you to show detail. However, they can look fake if you don't have good eyes. Take a close look at the eyes, mouths, noses and ears of others. Do you see anything strange? Are glasses worn by someone? Are there freckles around her nose? These features add depth and dimension to an individual's appearance.
-
Don't force smiles. Smiles are tricky. Most people smile naturally when they feel happy, but others don't. It's not natural to make them smile if you force them. Take a moment to think about what makes us laugh. Maybe it's something silly like a cat jumping through a hoop. Perhaps you simply love watching paint dry. It doesn't matter what it is, just keep at it until it makes you laugh.
-
Be creative. People are often afraid of being boring. It's not bad to be boring. You can find ways to be different from the norm. For example, you could ask someone to pose with his hands behind his back. Another option is to suggest that he wear a funny headgear.
-
Keep practicing. Practice every day and you will eventually be a better photographer. You will start to notice more interesting details around you as your skills improve.
-
Have fun. You should have fun taking photos. You'll be more inclined to return to the same process if you enjoy it. Plus, you'll probably end up with some really cool shots.
-
Share your work. After you've learned how to take beautiful pictures, share them among your friends and family. Explain to them why you took that picture. Show them the place you were. Let them know what you did.
-
Be patient. Sometimes things just don't click. It happens every day. Don't worry. You can just move on to another picture.